emember when Beyonce was drunk dancing with her BFFs in “7/11” and looked like a million bucks while trippin’ on some champagne?
Unfortunately for many of us, looking flawless from a night out of heavy drinking has never left us feeling glam-cute. Yet somehow, Japan has turned my dreaded Asian glow into a trendy look that has been hyped in countless fashion and beauty circles both locally and internationally.
Igari or the affectionately named “hangover look” was created by celebrity makeup artist Igari Shinobu with the emphasis on applying a bright blush high on the cheekbone to make the eyes stand out.
In its earlier days, Igari was very much a cute makeup look aimed to give the
impression of youthfulness and innocence. Now, it has evolved to include a grown-up version for mature girls wanting to achieve a romantic or edgy vibe to their everyday appearance.
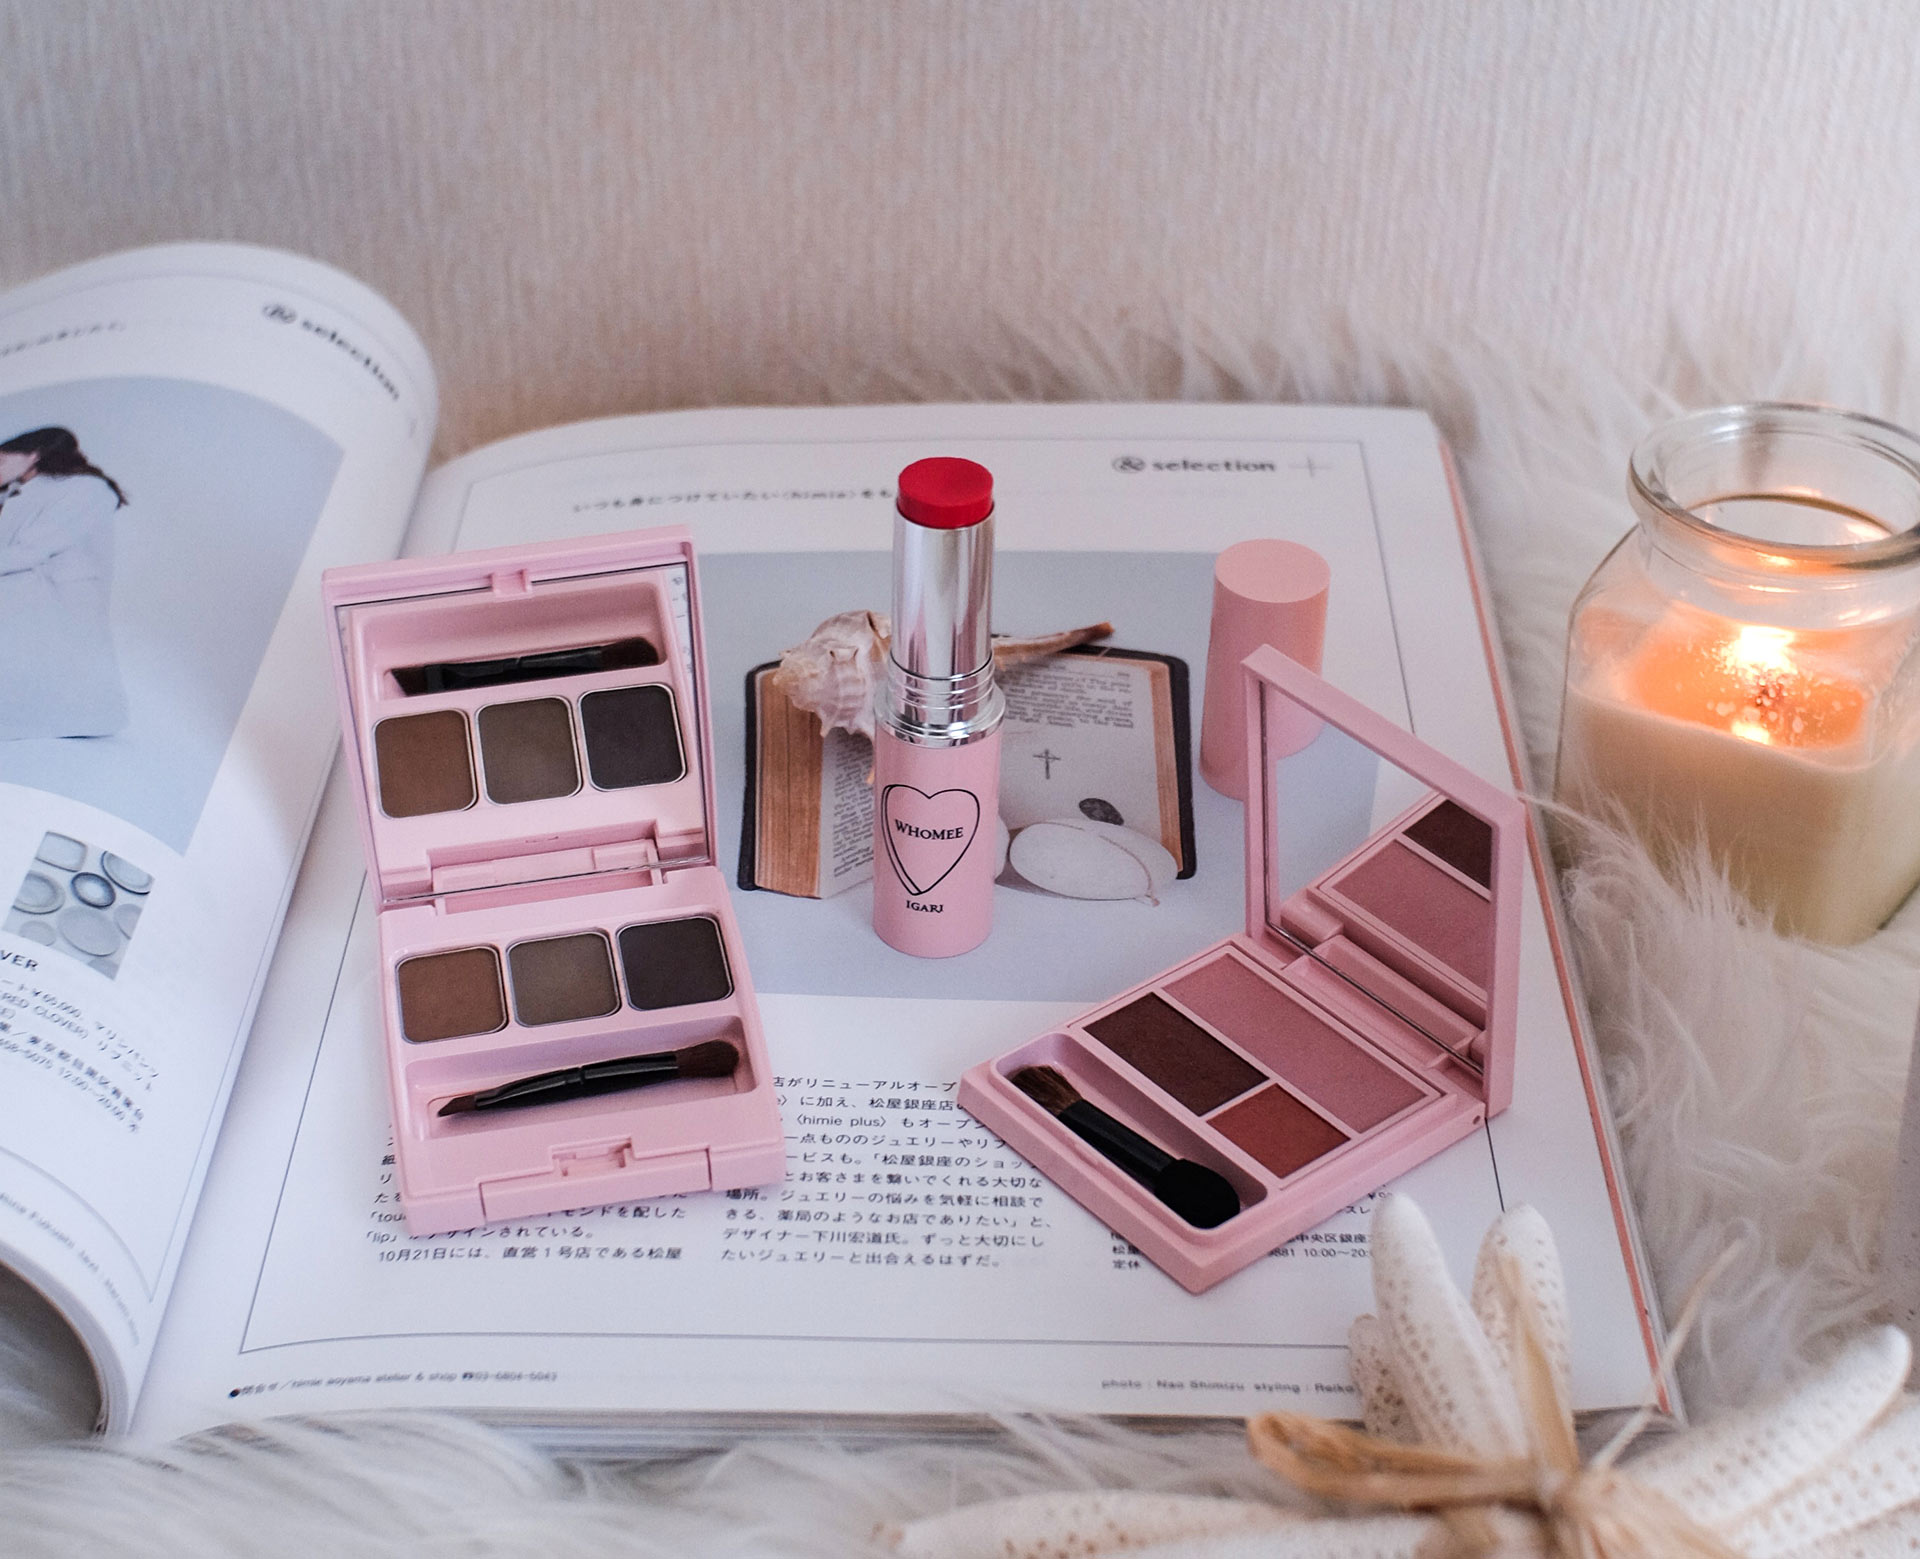
Last year, Igari Shinobu dropped a new line of makeup called “WHOMEE” with many singing praise for its ease of use and for being results-oriented. Best of all, it’s very affordable too.
How is the colour payoff? Is it any good? Let’s breakdown the essential items from the range to recreate the Igari look (in my opinion). For this review, I’ll be testing the WHOMEE eye shadow palette, the my buddy eyebrow powder and the multi glow stick.
Would you believe that I actually hated using this product when I first tried it?
For some odd reason, in the beginning the pigment would come off extremely light and it took around three application attempts to build up the colour to full coverage. I have very light brows so it was a struggle to even fill them in let alone shape them to definition.
After some more tries and working my way into the eyeshadow pan more, I noticed the colour was finally picking up on the brush and now, I love using it!
I highly recommend using the broad tip of the application brush at the beginning. Then, use small zig zag or patting motions to help apply the powder as swiping does literally nothing with this eyebrow powder formula for some reason.When it reaches the end, feather it out with the angled brush. I was able to create a faint tip shape but I highly recommend using an eyebrow pencil or crayon to define the edges as the shape looks weaker without it.
Pigmentation
As less is more when it comes to Igari brows, the pigmentation of this eyebrow palette is a buildable light-medium.
Igari style eyebrows are usually on the lighter side, relying on the natural hair shape of your eyebrows creating an airbrushed look with no harsh edges.
Although there are other colours in the collection that lets you play with alternative colours, I usually prefer dark ash browns and taupe as a good shade to fill in eyebrows for a softer natural look. The colour shade of “α dark brown” was the perfect combo.
LEFT: How to apply eyebrow shadow from WHOMEE website | RIGHT: Swatches of shade “dark brown”
eye shadow palette
SHADE: believe in pink | PRICE: ¥1,800 + tax
RATING: ★★★★
Application
Though you are free to apply the eyeshadow however you like, I wanted to follow the instructions found on the packaging and the official site to get that Igari look down.
I was surprised to find that for the palette “Believe in Pink,” the darkest shade (2) is applied all over the lids and the lighter coral metallic colour (1) should be used as an eyeliner with the lightest pink shade (3) underneath. As the coral shade (1) in proportion to the lightest pink shade (3) is in a smaller pan, I wanted to switch the two around since I tend to use more powder for my upper lids than my lower eye area. I’m glad I did!
It’s been a very long time since I last used eyeshadows but I was able to create a subtle contoured eye look that was wearable and very simple to achieve. The dark and light powder blended very easily into my skin with the brush and the coral metallic tone glided on nicely with just the sponge applicator.
Pigmentation
All the powders in the eyeshadow palette range are not true mattes and have some small amount of glitter particles mixed in.
Although I was a bit apprehensive that these would turn out looking sheer and cheap like something you would find at Claire’s, the colours complement each other very nicely and are formulated differently so each shade has a different pigment finish.
For “Believe in Pink,” the darkest shade is a bronze copper that looks great as a contour shade and crease definer. It’s the closest matte in the palette, super rich and blends out smoothly.
The medium shade is a coral shade with a metallic hue that’s stunning! It’s my favourite shade from the palette and looks lovely as a deep tone highlight.
The lightest shade is a fleshy baby pink which has the most shimmer particles. When I placed this colour on the centre and eyeliner area of my eyes it actually popped subtly and created dimension to my upper eyelid. Initially, I was a bit disappointed since the colour pay-off compared to the others was lacking in vibrancy and this was so much sheerer, but if you were to spread it under the eye to increase the “drunk glow” look, less is definitely better I think.
ABOVE: Swatches of shade “Believe in Pink” | BELOW: How to apply eyeshadow from WHOMEE website
MULTI GLOWSTICK
SHADE: mabu | PRICE: ¥1,800 + tax
RATING: ★★★1/2
Application
To apply the multi glow stick you can use your fingers and blend out or apply it directly and use a brush. The formula is buttery smooth that’s great for blending with just your fingers and it spreads smoothly across the cheek area with little effort.
As this product is multi-use for face, cheeks, and lips I also applied it to my lips straight from the stick. The flat bullet wasn’t hard to work with to fill in the Cupid’s bow, though with this formula, the colour is not strong enough to need the precision that you can get using a slanted bullet shape (more on that in the pigmentation section).
All-in-all, the multi glow stick was very easy to blend out with no excess effort needed even for a bold colour like red.
Pigmentation
Although I built up the colour on my hand to be a strong red in the picture, after blending it out it smoothed into a matte muted red that matched the colour of a normal blush.
This wasn’t necessarily a bad thing since I still wanted the Igari blush to look wearable even if it might seem over the top. The formula is very forgiving and blendable that even this overly painted red lost its vibrancy and soften to create a romantic flushed appearance.
Unexpected was how the colour turned out on my lips. I thought the red would be a bold consistency on the lips but it turned out more stain bitten or a swollen red just like if you just ate some really good spicy food. This is probably because of the formula as it felt more oil-based than the thicken texture you would find in a proper lipstick. If you like tainted lips, this formula’s colour gives you that look for sure but you might want to get a lipstick if you enjoy a more polished look.
PACKAGING AND DESIGN
s you can tell straight away, WHOMEE’s packaging is super cute and stands out from the usual clear packaging from most Japanese makeup competitors like Canmake.
The minimalistic baby pink vibes remind me of Korean beauty brand “Etude House” mixed with Kylie Jenner’s “Kylie Skin” and looks great when they are all displayed together.
The unit carton is also genius. It’s nicely designed with embossing making it feel upscale but if you undo the box, it also becomes an instruction manual. How smart!
The only problem I have is the consistency in naming. All products have a specific name but they also use colour names at the top in English. For example, on the eyeshadow palette it says “pink pink” to describe the proper name “Believe in Pink” which is written on the back in Japanese. It’s a bit problematic when trying to find the item you want so take note when shopping.
Other than that, 10 out of 10.
VALUE FOR MONEY
ost WHOMEE products average around ¥1,800 excluding tax which is the same price range as most drugstore brands like Revlon and Maybelline.
For the kind of results and quality you see using WHOMEE, I would 100% recommend buying it.
If you are familiar with K-beauty I would compare WHOMEE to the same roadstore brands like Etude House and Too Cool For School in terms of quality and price point which are brands I personally love! If more mass produced Japanese cosmetics were made like this, K-beauty could have serious competition on their hands.
have never experienced traveling to the north region of Japan before, that is until I found out about a magical wonderland dedicated to foxes among the peaceful green forest overlooking the peaceful countryside in the Miyagi prefecture.
On my first venture to the Tohoku area, I commemorated my visit with a mandatory stopover at the famed Zao Fox Village – an outdoor zoo where you can see cute red and white fox fluff balls up close and personal!
There is no denying that Japan has some of the most unique experiences to enjoy the company of adorable animals with plenty of animal cafes and animal islands to fill this deprived writer’s existence and the Fox Village is the most exotic in my opinion.
Located high up in the mountains of Shiroishi, Miyagi, here’s how I enjoyed my time with these mischievous furry friends.
FEATURES OF ZAO FOX VILLAGE
The Open Enclosure
fter entering the main area of the fox village, you are immediately greeted by curious foxes interested in your presence.
It was a pleasant shock to be able to get so close to these usually wild creatures and the enclosure space is large and wide enough that the foxes are free to run and walk around you. As foxes are nocturnal by nature, not all of them are the active type. Most seem to enjoy being tucked up in their tails and napping among the many tree stumps and burrows.
Though there is a paved pathway to make it easier to navigate, you can also walk freely on the unpaved nature areas where the piles of winter white snow provided a
lovely sight in contrast with their fiery red or jet black fur.
Being able to walk freely alongside these animals with little to no staff supervision was an added perk of the experience but it is also important to note their curiosity can get the better of them. The foxes are known to tug on bags for food or even pee on guests’ legs!
Before entering, the staff will give you a behaviour briefing with tips to make you feel more at ease. Also, the fox village does not allow visitors to touch the foxes in the open enclosure and you will need to pay to be able to touch and hold one which might be a bummer to know for some.
The Feeding station
n order to feed the foxes, you must purchase a small food bag at the register before entering the enclosure and only feed the foxes once inside the Feeding Station.
Getting inside the Feeding Station wasn’t quite as simple as I thought. These foxes were so darn smart they tried to be sneaky and enter the Feeding Station after me where they weren’t allowed! When opening the doors, make sure you look around you and move quickly as once the foxes see you about to enter, they will approach you understanding you are about to give them food. It took me a few tries to avoid their attention but I managed to “Mission Impossible” myself by walking backwards using my body as a “shield” to slither through the gap I created. Phew!
When you look over the edge, you’ll see the little critters amass towards the side eagerly awaiting a treat. Simply throw the feed towards them and watch them eat it below.
arked by a trail of red torii gates at the north of the enclosure was a shrine dedicated to foxes.
At first I thought this was a lovely feature to have at the zoo but after looking around I slowly found it to be unimpressive.
Along the trail of torii gates, a majority of them looked a bit shabby with the paint extensively peeled off to expose the wood underneath hinting to the fact that they
haven’t been maintained in a while. The shrine itself was also very basic – a small hut surrounded by a fence in the signature red vermilion colour.
In all fairness, I assume this was done intentionally as anything fancier would be ruined by the curious foxes but I felt it could have been enhanced to be educational. A few more signs dedicated to a more historical look at foxes in Japan perhaps would be more pleasant to see rather than the numerous warning signs you’ll find around the enclosure and something I would be keen to know more about.
It seems recently they have upgraded more torii gates since my visit.
The Petting Zoo
nother feature of the fox village is the petting zoo area filled with small farm animals like guinea pigs, goats, Patagonian Maras (a small type of Capybara) and, you guessed it, more foxes. The petting zoo area is also where you can experience holding and touching a fox for a small fee. Springtime is cub season so you can expect to see many cute baby foxes
being born and they also offer a “hug a baby fox” experience too.
As farm animals seemed a little lackluster compared to the foxes, I skipped them to look at the foxes in the caged area located just ahead. This section acts like a hospital of sorts and is used to house the juvenile young foxes, the sick, injured or currently breeding foxes. You can also find the exotic arctic fox here if you are lucky.
Here’s a price list of all the fees for general admission and experiences (as of 2019):
GENERAL ENTRY
FOX FEED
FOX HOLDING EXPERIENCE
Here is some helpful general information for Zao Fox Village.
TIPS TO KNOW
s the saying goes: “You never know until it happens to you.”
Visiting Zao Fox Village was my first experience of Japan’s interesting animal haven spots and traveling through a new part of rural Japan was a welcome breath of fresh air away from the hustle of busy Tokyo life.
Though I am still new at traveling domestically here within Japan, there is always something to be learnt and I hope I can share with you some helpful tips and tricks to better prepare you on your journey.
Here are some helpful notes when preparing for your visit to Zao Fox Village:
Ethics
here are a few articles online that comment on the unethical nature of the foxes living at Zao Fox Village which I wanted to explore here. Unfortunately, there are no official details in English or Japanese about why the Zao Fox Village was started online that I could find at least. However, there are facts that the staff do explain during your briefing and some kind bloggers who were able to translate.
All foxes in the village are domestically bred and tamed. As they are all vaccinated, there is no fear of Echinococcus infection from being spread which allows a safe interaction between humans and animals.
One of the main problems I believe is the assumptions that can be stemmed from the misinterpretation of the word “sanctuary.” The original foxes at Zao Fox Village were actually rescued from the fur trade and they don’t sell any of the animals born in their care which makes it sound like an animal sanctuary of sorts. But, like a wonderland attraction, I would not call it an “animal sanctuary” in the sense of endangered species conservation. To me, it’s a themed zoo selling the image of a “fox heaven” experience.
Another issue was the animals kept in cages. There are a number of reasons explained as to why an animal had to be put in a cage. This could be due to sickness and preventing cross infection, being overly aggressive and needing to be isolated from the others or people, or during the breeding season. Regardless, animals kept in cages is an ethical dilemma that will always face heavy criticism. Unfortunately, in many Asian countries including Japan, views on pet and animal ownership can be very polarising especially from a Western perspective.
For me, the animals did seem fine in their cages and did not seem to be in distress or crying. That being said though, I do think the cages look shabby and would like to see them change its layout and structure.
Also, I think they should not leash the animals especially the farm goats. I speculate they did this in fear they would jump their pen and risk heading into an area they shouldn’t be in. I would rather see them make a more secure space for the farm animals or exclude them for safety reasons as an ideal situation.
Some people are concerned about the fox feed that the staff provides for the feeding station thinking it’s too similar to a cat or dog food. Foxes are well adapted to human environments and they also can enjoy eating pet food as written here.
I try to keep an open mind and I do believe that the staff are doing their best to take care of all their animals. The animals all seem happy, well looked after and healthy though, I do think there should be improvements to the cages and more information on processes for transparency and education.
My two cents is this, if you hate zoos or animal enclosure environments, I highly suggest you do not visit Zao Fox Village. If you love animals, are looking to have a unique experience with them in an open free space and have an open mind, then I do recommend going to Zao Fox Village for the experience.
The easiest way to get to Zao Fox Village from Tokyo is via bullet train (shinkansen). With the bullet train at Tokyo station or Ueno station, take the JR Tohoku bullet train called Yamabiko – やまびこ Sendai all the way to Shiroishi-Zao station. Be careful as there is another stop also called Shiroishi station which is further away.
Getting to Zao Fox Village from Shiroishi-Zao station:
After arriving at Shiroishi-Zao station, you will need to take a bus or a taxi to get to the Zao Fox Village. I highly recommend the taxi as it is the most convenient method.
For going to Zao Fox Village, there should be taxis waiting outside the station but the tourist information center can call one for you. When going back to the station, the staff at the Fox Village can call a taxi for you.
Using the bus to get to Zao Fox Village from Shiroishi-Zao station is the cheapest way but incredibly limiting.
The local Castle Kun bus runs on Tuesdays and Fridays from Shiroishi Station to Kawarago Dam, at 7:58am and 1:35pm. You must ask the driver to let you off at Zao Fox Village, as it is not a regular stop and also confirm the time and where to wait for the return bus to pick you up. To be honest with all this hassle, it’s not worth it but if you do decide to take this route, it is probably best to take the first bus and take a taxi back.
Arriving By Bus:
A cheaper method is to take a highway bus to Sendai however you will still need to catch a local train to Shiroishi Station.
Arriving By CAR:
If you have a Japanese or the international driver license you can rent a car and enjoy the freedom of traveling at your own pace.
Using the beauty benefits found in fermented soy milk, soy protein and extracts derived from non-GMO soybeans, SANA’s Soy Milk All-In-One Moisture Jelly Gel (Namerakahonpo) is a pudding-like face moisturizer that “melts” when it touches the skin. With its high absorption ability, its formula is made to make dry skin bouncier, firmer and restore hydration without the need for a costly day and night skincare routine by combining six skin care products into one bottle.
I first heard about this cream from online reviews speaking highly about its ability to cure stubborn dry skin but also, there are some who also say they were able to see immediate pumping effects after two days of usage. Could this be the answer for dull crusty looking skin? Let’s dive into this moisture-rich gel formula and pick out what works and what doesn’t.
APPLICATION
Hands down the best thing about this product is its convenience when applying.
Even though I’m someone who invests taking care of my skin seriously, I must admit I can be very lazy at maintaining my own routine too. Seriously, a full-on skincare routine is definitely a time-consuming task to undertake on a nightly basis. Being suitable for day or night application, SANA’s Namerakahonpo All-in-One Moisture Jelly Gel simplifies what would usually be six individual skin care steps into an all-in-one formula meaning less wait time when waiting for formulas to dry between
layers, and not having to balance a facial mask from falling off your face when you want to sit upright. It’s a total time saver!
Another plus is that this face moisturiser is not a cream formula but a kind of watery milky gel that’s great for anyone who isn’t into heavy or oily moisturisers. It’s lightweight and smooth when applied, easy to rub into the skin with no sticky or visible residue. Having said that though, I do suggest to layer your application more than once especially during cold and drier weather since the formula doesn’t last as long as oil-based types.
L: Normal side | R: Side using All-in-One Moisture Jelly Gel
SKIN BENEFITS AND EFFECTS
This All-In-One Moisture Jelly Gel has one mission only: to make the skin hydrated.
Although it’s a shame it doesn’t have any other added skin benefits, the formula in this jelly gel is created to aid winter dry skin by combining the benefits of the moisturising properties found in multiple skin care products into one.
For me, the extra boost of hydration and liquid formula really helps take care of those stubborn crusts and flake-patches that develop around the corner of the nose. This always frustrates me especially when I wear makeup but it seems to appear less since using this cream.
What I don’t think works is the primer. The primer in SANA’s Moisture Jelly Gel doesn’t smooth out your pores giving a “bubble” or “pothole” look if you have bad pores like me currently.
Also, the claims of seeing immediate bouncy and firm skin were not noticeable to me even after using this product for over a month. This is most likely because I do use other products to tackle my skin problems and the results from SANA’s Moisture Jelly Gel are not as recognisable. If you are someone who doesn’t have a specific skin care routine or has mature skin, you might see different results than I have.
Close up of my pores after putting on a light layer of foundation. The primer should have “airbrushed” the lumpy look but it didn’t.
Packaging and Design
The product comes in an easy screw-off tub and though it is a generic white shape with a sticker on it, it’s still nice to hold and not too cheap feeling.
Germaphobes might freak over bacteria as you will need to dip into
the product directly and there is no spatula or spoon which comes with it.
Overall, SANA’s Namerakahonpo All-in-One Moisture Jelly Gel’s design isn’t dynamic or special but decently good for everyday use.
VALUE FOR MONEY
Considering this product combines six other products in one, at roughly $10 it’s a great bang-for-your-buck and it contains enough product to last for a month or so.
Though it might sound like glorified moisturizer, I would definitely place the
Namerakahonpo All-in-One Moisture Jelly Gel as a product you would see under the higher-quality skincare range at your local beauty retailer as it’s definitely more concentrated than normal lotion with better ingredients.
UPDATE: Due to the 2020 coronavirus, some of the festivities and events for Japan’s cherry blossom season have been cancelled.
See Tokyo’s World-Famous Cherry Blossoms
e’re finally at winter’s end here in Japan and it’s time for another annual event – the season of cherry blossoms!
Each year Japan celebrates the calling of spring with the anticipation of its cherry blossoms blooming. Everywhere you look there’s a fresh lineup of local events to attend, and of course, a variety of limited edition food items and goods for sale to really get you into the spirit of the season.
As the symbol of spring, Japan’s cherry blossoms have always amassed fascination and admiration from locals and travelers making it the must-see event of the season.
But don’t just see it through the lens of a tourist passing by simply because you’re traveling. Why not make it a little more special by enjoying a little R&R and treat yourself to a day of picnics, sunshine and festival hopping just like the locals do!
Here, we’ll introduce you to the seasonal event of cherry blossom viewing in Japan and how to get the best out of the experience!
When does Cherry Blossom Season Begin
ust like checking the weather forecast before heading out, Japan’s meteorological corporation has a national cherry blossom blooming forecast based on the standard pale pink cherry blossom with five small petals.
Although the meteorological corporation’s starting dates are a great help to plan your plane flight, it’s also important to know their predictions can be, at times, misleading. If you arrive too early, you’ll see more closed buds than flowers but wait too late and you’ll see more green leaves than flowers. For me, more importantly,
their date predictions on when trees will be in full bloom will guarantee you an unforgettable sight of the cherry blossoms and take out the guessing work.
Also, take note that the first month of spring still brings strong winds and the rare typhoon which can spoil the blooming season’s longevity. But don’t fret! There are other kinds of cherry blossoms with varying shapes and intensities in colour which bloom later to enjoy should you miss the early blooming time. See this article for more details.
eno Park during cherry blossoms season brings big crowds of people setting up their picnic spot but don’t let that discourage you!
Ueno offers a nice glimpse into Tokyo living and also a peek at the gorgeous spreads salarymen companies prepare for their workers. During the evening, the park lights
up their trees with lanterns to continue the festivities into the night.
You can also take advantage of the nearby attractions such as Ueno Zoo, Ameyoko, and other shopping streets, the local temples for some sightseeing and it’s also an easy stroll to Akihabara.
Access: Next to Ueno Station.
2. Nakameguro
little bit of Kyoto in Tokyo, Nakameguro is beautiful during cherry blossom season as you can see rows of overflowing cherry blossoms growing along the riverside. Nakameguro is not only pretty during the day but the night as well when the trees are lit up and the local nightlife begins.
Take advantage of what’s in Nakameguro and enjoy the boutique shopping, international food scene, and great bars.
Access: Ikejiri-Ohashi, Meguro, or Naka-Meguro Station.
3. SHINJUKU GYOEN
he “Manhattan Central Park” of Shinjuku you could say, this spacious and peaceful oasis in the middle of Tokyo’s liveliest business district has around 1,100 cherry blossom trees.
Entrance to Shinjuku Gyoen is ¥200 and offers a unique opportunity to get up close and personal as their cherry blossom varieties “Weeping Cherry” and “Tokyo Cherry”
are so large, their branches span wide and touch the ground. It’s a great photo spot and you can move freely around the branches making it feel like you’re intertwined in its flowers.
Access: A short walk from Shinjukugyoenmae Station, Sendagaya Station or Shinjuku-sanchōme Station
oving a little further from Central Tokyo’s CBD, Inokashira Park is located in the ever cool neighbourhood of Kichijoji. The park is quite big and large enough to fit a pond, a petting zoo, and an aquarium within the grounds!
The crowds, especially young couples, during cherry blossom particularly enjoy the swan boat and boat rides but be warned. Local legend has it that the jealous goddess
Benzaiten curses couples who ride the boats to break up soon after.
Regardless of the tale, Inokashira Park is a great location for a cozy weekend. Enjoy the live street performances, artist market and it’s also a short walk to the Ghibli Museum.
lthough not an overly touristy location, Nakano has many cherry blossoms which line the main street which leads conveniently to the ward’s locally run sakura festival at Arai Yakushi Temple.
The sakura festival is a must visit since it’s a great way to experience a typical Japanese matsuri-style festival that mainly occurs in the summer. You’ll see lots of people dressed in yukata and the food and entertainment are great for those casual
evenings out.
The area is also a nice mixture of laid back old school charm mixed with an Akihabara otaku vibe since Nakano is home to Nakano Broadway, a hobby enthusiast’s paradise.
Access: A short walk from Nakano Station.
What to do During the Season
1. Sakura Festival
robably my favourite thing to do during cherry blossom season, there’s nothing like the sound and energy of a festival to get you into the spirit of things and sakura festivals offer great entertainment both traditional and modern.
During sakura festivals, and depending on where you visit, there are many types of performances to see other than the usual live music and dance acts. Venturing to
more local neighbourhood areas like Nakano, you can enjoy local fanfare like carnival games and see local talent shows while more international areas like Nakameguro have a more western vibe and offers foreign treats like mulled wine, sangria, German beers, and sausages to enjoy mixed with traditional performances such as buyō (a traditional performing art similar to kabuki theatre).
Playing traditional matsuri games at Nakano Sakura Festival
pend a unique day enjoying the local scene by setting up your blue tarp mat having a picnic under the shadow of a billowing flower tree. Hanami or “flower viewing” is a popular picnic event where people enjoy eating and drinking while viewing flowers. Although there are no “rules” to doing hanami right, there are a few staples to the activity which every local seems to follow:
The Essentials for Hanami
THE FOOD: Lunch Boxes, Side Dishes, Snacks, and Yes, Alcohol
Wondering what a typical hanami spread looks like?
Although homemade obento boxes are popular, hanami food is generally store-bought for convenience. The food (even obento boxes) are shared amongst everyone and include extra sweet or savoury snacks as some hanami parties can last until the evening if planned.
Some popular food ideas include karaage, lunch boxes, sandwiches, onigiri (rice balls), takoyaki, yakisoba, hanami dango, sakura mochi, and fruit.
Another fun thing to do is to cheers the arrival of spring with a drink in hand. During the festivities, it is legal to drink alcohol openly in public areas and you can also find drink stands that sell chilled cans of beer should you forget yours. So grab your chuhai, beer or wine and kanpai!
Where to Purchase: convenience stores and local supermarkets like Maruetsu, Peacock or Seiyu.
FOR SITTING: Picnic sheets and sitting cushions
With the chaos of multiple hanami parties happening around you, space will get very tight fast.
Forget about setting up the tables and chairs and do as many other people do and simply spread out a tarpaulin mat on the ground to enjoy your picnic party.
Unfortunately, the ground may be hard and uneven, so I recommend buying inexpensive sitting cushions from the 100 yen store to help feel more comfortable.
Also, don’t forget to take your shoes off before sitting down! The no-dirty-shoes-allowed rule also applies here too.
Where to Purchase: convenience stores, local supermarkets, and 100 yen stores.
FOR EATING: Paper Plates, Disposable Cutlery, and Tissues
Just like with any other party having extra plates and cutlery will come in handy especially with bigger groups. Another pro tip is to bring some wet wipes or “oshibori” for when it’s hard to locate a convenient way to wash your hands or clean up spills.
Where to Purchase: convenience stores, local supermarkets, and 100 yen stores.
FOR FUN: GAMES
Looking at flowers all day is nice and all but you can really liven up a party with some games to play as well.
Simple party card games can be found at the 100 yen stores and offer an interesting insight to the childhood of Japanese locals or, something more familiar like Cards Against Humanity or Uno and you’ll ensure everyone has a riot for hours on end.
Where to Purchase: 100 yen stores, Bic Camera, Yellow Submarine and Don Quixote.
THE CLEAN UP: Garbage Bags
Just as pretty as the cherry blossoms are on the tree, keeping the environment clean and tidy is also expected of everyone as much as possible.
Do the right thing and trash your garbage responsibly by saving time and effort and separate bottles, burnable garbage, and non-burnable garbage in bags before taking them to the designated garbage area.
3. Enjoy Spring with Cherry Blossom Flavoured Treats
id you know that cherry blossoms are also edible?
Although I am not the greatest fan of the taste as I think it’s too similar to a soap fragrance many cherry blossom foodstuffs mixes fruit flavours like strawberry, peach or cherry to sweeten its flavour.
The most popular limited edition item to get would be the Starbucks sakura edition frappuccino or latte that’s only available in Japan but do venture around to taste all the shops have to offer.
You can also buy cherry blossom tea, chocolates, and alcohol that’ll make great souvenirs.
4. Night Illuminations (Yozakura)
eeing flowers during the day is not the only time the locals go to see these pretty flowers. Yozakura or “night cherry blossom” is a common nighttime event for locals to enjoy the sight of these flowers lit up like glowing clouds.
The best places to head for yozakura are Chidorigafuchi Park, Rikugien Garden, Nakameguro and Ueno for their impressive displays.
From the lovely pink cherry blossoms of spring to the fiery red autumn leaves in fall, every change of the season shows off the beauty of Japan’s local nature. There are a number of flowers, plants, and local scenery that are worth seeking out during full bloom that nationally represent each season – even the locals treat it as if Japan’s four seasons possess some particular quality unique only to their own country.
Autumn in Japan is gorgeous for nature and is my favourite time of the year here. I would even argue it’s prettier than springtime (I know, gasp!).
A popular scenic sight in autumn located near Tokyo in Kanagawa’s Hakone is the pampas grass fields of Sengokuhara. It’s a breathtaking hillside landscape filled with overflowing tall gold-toned grass and looks stunning through the camera lens where you will be moved by the overwhelming wonder of the scenery mixed with the warm autumn sun. It was also voted the “Best 50 scenic spots in Kanagawa” and the “Best 100 spots to view flowers in Kanagawa.”
How can you step into this waking daydream?
Follow me to know the ins and outs of this heavenly field of wonder.
The Best Time to Visit
SEASON
There are four different stages that Sengokuhara’s pampas grass fields go through to get to full bloom:
As a no-brainer, it is best to avoid visiting in March as the field will be charred to promote good growth and protect the landscape from other intrusive trees and weeds. If you do visit during summer, you can enjoy the fresh green fields but I highly recommend to visit in November when the grass has turned fully into its signature gold.
TIME
Unfortunately, though the best viewing period is when the field is completely coloured gold it is also the time many people visit the fields. They can get quite crowded particularly on a good day after 12PM.
However, being a public site it is open at all hours so you can get there as early in the
morning as possible to have the place to yourself.
Alternatively, you can go in the late afternoon to catch the sunset. During either time, the light will filter through the grass which will increase its radiance.
Although the weather was raining and overcast when I went, I was still able to enjoy the scenery and take some nice photos!
The fields are not only great for nature photography but also fashion portraits too!
Although the field area itself is very large and wide there is unfortunately only a single walk path that people can walk through. There are plans to extend it in the future but for now, you can only walk up and down along the rocky pathway. The good thing though is that you can still get up close and touch the grass but not damage it, of course.
The main path has a lot of potholes and is not paved so wearing closed toe shoes are
best when visiting. Alternatively, there is a paved trail portion on the side should the main path journey be too difficult to walk or becomes muddy due to rain.
Once you make it to the end at the top you can get a great view of how the grass look like rolling waves and see how vast and far the grass can grow on the hill.
STAY DURATION
After taking some snaps and wondering around a bit, I would say the whole experience took around 30 minutes to 1 hour. Sengokuhara’s Pampas Grass Field is a good pit stop to walk around and do some scenic exploring but a good point to note
is that it isn’t the best place to plan an entire day around and traveling to the area can be a pain in the neck to get to if you are relying on the public transport’s hourly time schedule.
The view going up.
The view going down.
GENERAL INFORMATION
PRICE
OPENING HOURS
How to Get There
Hire a Car
As rural areas in Japan have slower public transport timetables than urban areas, going by car is the best way to get from place to place.
Google Maps and Apple Maps in Japan both work well in English and Japanese and makes driving a breeze if you are not familiar with the local language. Additionally, most rent-a-cars in Japan are equipped with an inbuilt navigation system should you not have access to the internet while traveling.
Arriving by Bus
There are two main ways to take the bus to get to the Sengokuhara area (from japan-guide.com):
From Hakone-Yumoto Station, take the Hakone Tozan Bus, Togendai Line (Route T) (30 minutes) → to Sengoku Kogen; the field is near the bus stop
From Shinjuku Station, take the Odakyu Hakone Expressway Bus (roughly 2 hours and 11 minutes) → to Sengoku Kogen; the field is near the bus stop
OTHER PLACES OF INTEREST
Owakudani Valley
Owakudani Valley or as the locals call it “Jigokudani” (the Valley of Hell) is a 3000-year-old volcanic valley with active sulfur vents that spew out volcanic gases and steam. As a hot springs area, it is famous for their black coloured eggs believed to extend
one’s life by 7 years! Don’t miss the upward trail by taking the Hakone Ropeway to see how they boil the eggs and appreciate the views of Lake Ashi and Mt. Fuji from the top.
Chisuji Falls is a small but pretty forest waterfall with hiking trails to enjoy. It’s called “the waterfall of a thousand threads” because the water spills between the rocks like many thin “threads.”
It’s surrounded by maple trees and would no doubt look amazing during autumn time but summer time has another special surprise. In July during the evening, hundreds of fireflies gather and glow creating a mystical sight for the eyes.
Lake Ashi is a great place to enjoy a lot of tourist-friendly attractions like traveling on one of the famous Lake Ashi pirate ships that cruise around the lake, the Hakone-en
Aquarium, Hakone Tokaido Checkpoint as well as visit the many local shops and nature walks that are accessible via here.
Temple-hop along Hakone Shrine
If you do head to Lake Ashi you can also visit the famous Hakone Shrine. It is famous for its tori gate situated as if it is “floating” in the water and is a popular photo spot
for visitors. There are also two other shrines nearby that are worth the visit – the nearby Kuzuryu Shrine as well as Hakone-Mototsumiya Shrine to see the best view of Mt Fuji (see my guide here).
First released by South Korean brand NOT4U, “peel-off foundation” is a new beauty trend that helps conceal sore and angry looking acne by spreading a clear liquid gel under your foundation to protect your blemished skin from worsening. Yes, although it isn’t an “actual” base foundation that peels off like some horror film special effect, it’s an interesting look at the weird-wonderful creations produced by the makeup industry.
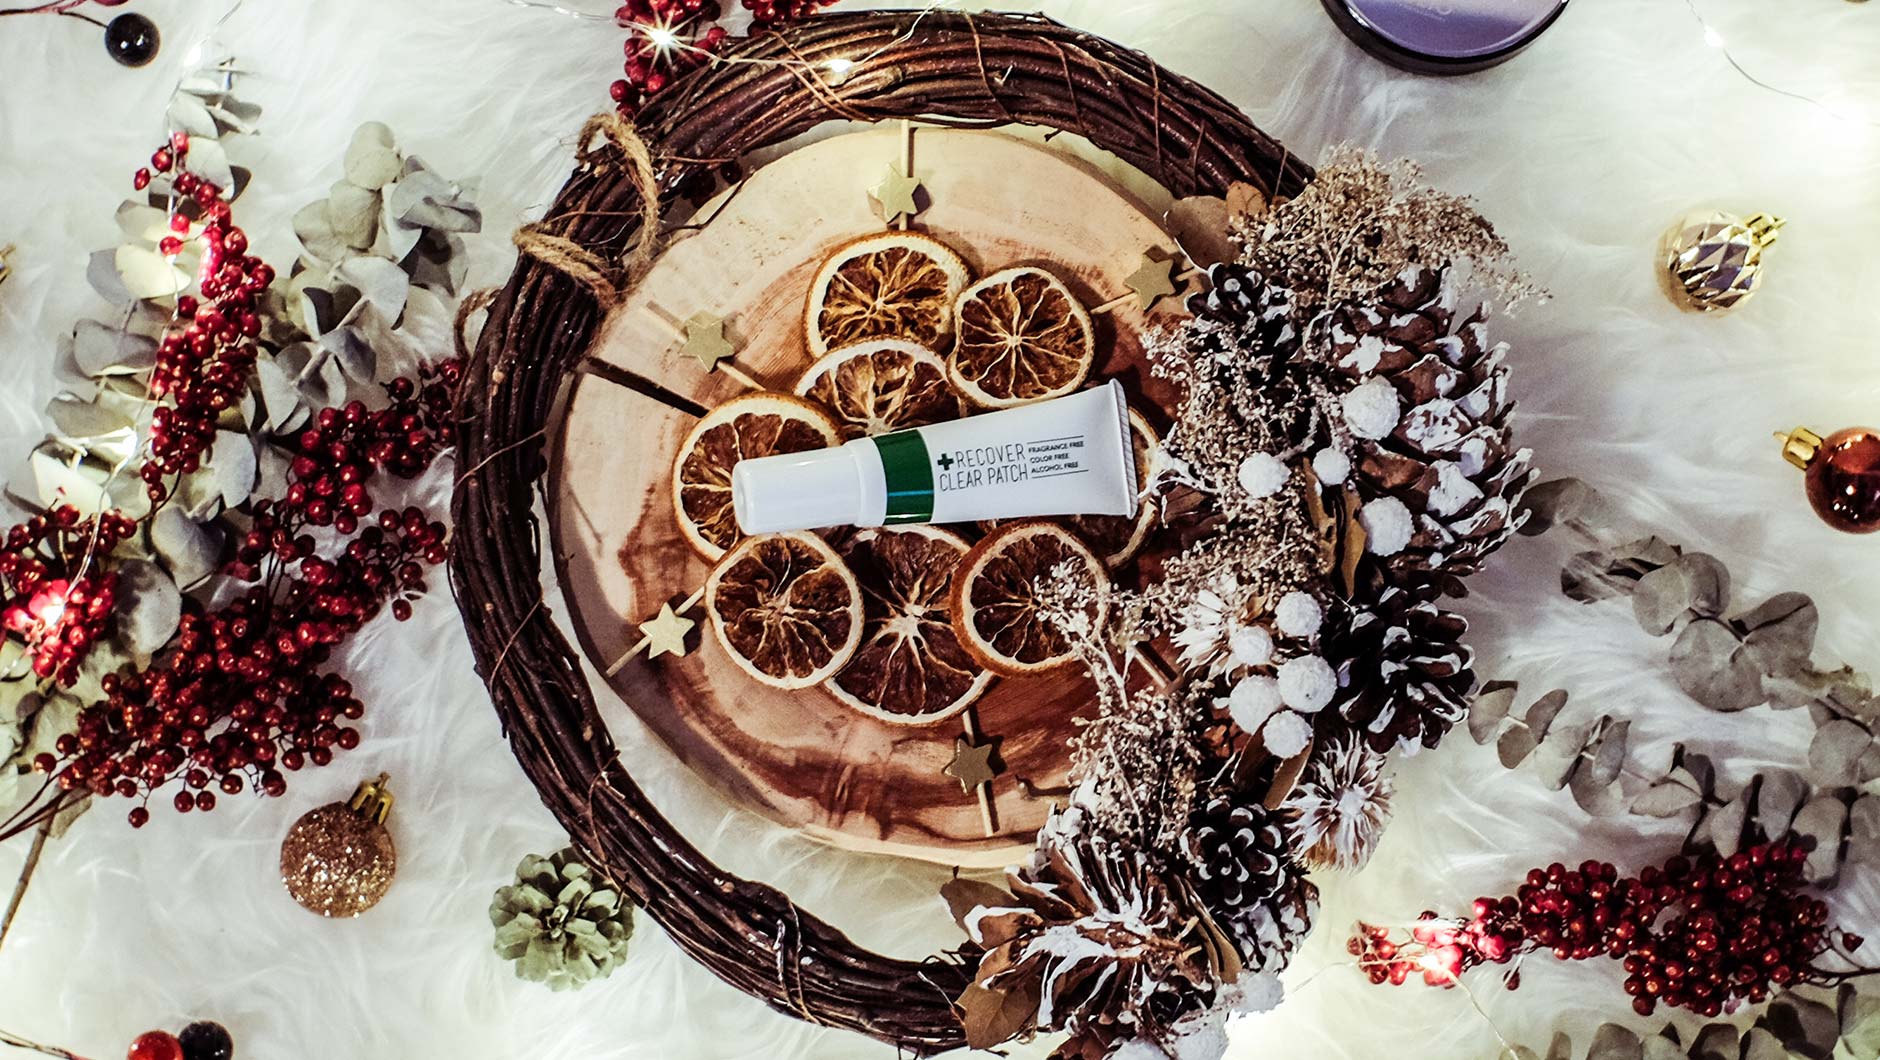
Now, Japan also has a local version by cosmetics company COGIT called the “Recover Clear Patch” offering the perks of guilt-free makeup days for those not-so-fine days.
Let’s demystify what’s really lying under its gimmicky name…
APPLICATION
As the gel creates a barrier to protect your acne, the product needs to be spread evenly and thinly before any base makeup is applied to the skin. Thankfully, it is easy to apply! Just a small droplet is enough to treat the area just like using an ointment and then, wait for it to dry completely before applying your usual makeup routine.
The drying time is around a minute but could take longer if you have applied too much by accident. Once it is dried, you can see that it creates a shiny “film” over your skin which is quite firm and sealed quite well to the skin. Although the packaging says to wash it off with warm water, many people and PR images show them doing that gross-but-satisfying pinching and pulling at the edges to take it off like flaky
dead skin. Disgustingly… good!
It is because of the film’s sensitivity to water that there are some caution steps you will need to remember when doing your makeup:
You can’t use a damp beauty blender directly as it will break the film so fingers or cushion air puff application is best.
Applying a very watery type foundation will also pose a challenge. Try to work thinly and build up to make sure it doesn’t break the seal.
Do not rub the seal.
Left Side: Shiny appearance due to the larger area being covered on the cheek and forehead. | Right Side: Spot coverage on smaller problem areas near the lip and forehead.
My acne spot after applying one layer of light-medium foundation.
SKIN BENEFITS
Aside from providing a barrier to block bacteria and other stuff that might make your acne worse from applying makeup over it, Recover Clear Patch has malic acid and citric acid which have exfoliating and skin tone improvement properties. Having said that, the packaging does warn to avoid areas with abnormal skin such as scars, swelling, eczema, and rashes.
My thoughts about the skin benefits of this product are that it is only suitable to treat
very mild environment-causing acne. It gives the wearer peace of mind that there’s something to make it more beneficial to your skin but is it really strong enough during the hours you spend wearing makeup to see any real effects? I’m skeptical about that and still think it’s better to create a good skincare routine with more concentrated ingredients to cure your acne rather than to simply cover it for cosmetic reasons.
LONG-LASTING
After making many exaggerated funny faces to see if the patch would lift off, I was happy to find that it still remained on the skin with no breaks. Having said that though, your face makeup will wrinkle in that kind of cling wrap scrunchy way when you laugh, smile, and so on. It is because the seal doesn’t absorb the product like your skin does but stops the absorption with its coating. Over time, these wrinkles will definitely deteriorate the seal but it was nice to know it wasn’t in an instant.
Ironically, however, the one thing that I was not expecting was how fragile this patch seal was when pressed with the slightest bit of pressure!
While I was seeing if the makeup would come off from simple rubbing, I was surprised that the seal on the side came off so easily without applying much pressure at all. I don’t think it would last very long outside and during daily use when it would be only natural to touch your face occasionally by instinct.
Another thing I noticed was how the area I applied spot treatments of the patch gel created a crust halo with the foundation around the edges giving the appearance of flaky skin. Definitely not an attractive look and this would make anyone want to take it off immediately.
Creasing from the patch seal.
Left side: Peeling because I rubbed my cheek slightly | Right side: Flake patches under foundation makeup
PACKAGING AND DESIGN
There’s not too much to rave about the design of COGIT’s Recover Clear Patch’s packaging since it’s very basic but there is something to “rant” about ever so slightly as it crosses my mind. Isn’t this Recover Clear Patch packaging a copy of NOT4U’s?
Let’s break it down:
They both have a green and white packaging colour scheme and both come in a tube form. The green and white are slightly brighter on Recover Clear Patch’s than NOT4U’s.
They both have a green coloured “bar” around the tube.
They both have a medical-looking “+” sign in their name although in different colours (NOT4U is red or grey and Recover Clear Patch is green).
Given that their package appearances overall uses simplified designs it’s quite easy to spot the similarities. Also since Cojit started selling on Amazon in March 2018 and NOT4U in May 2017 I’m inclined to believe that NOT4U had the design originally. Personally, I like NOT4U’s packaging more because it looks more polished and designed with a brand image in mind while Recover Clear Patch’s packaging looks very generic and standard.
Left Side: NOT4U Real Skin Patch | Right Side: COGIT Recover Clear Patch
VALUE FOR MONEY
Retailing at ¥1,296 the Recover Clear Patch isn’t going to break the bank but for an item that has more cons than pros, it’s money better spent elsewhere in my opinion.
For the same amount of money, you can also get pimple patches that work better in my opinion.
WHERE TO BUY
Unfortunately, Cojit’s Recover Clear Patch is only available through Amazon Japan but you can try NOT4U’s Real Skin Patch below:
WHAT DO YOU THINK ABOUT THIS “PEEL-OFF FOUNDATION” TREND?
LOVE IT OR HATE IT? LET US KNOW!
Run by two travel and lifestyle bloggers, The Hidden Thimble focus’ on creating truthful and in-depth travel guides, food & beauty reviews. Enjoy drool-worthy photography from around the world!